April 8, 2024
Do you have confidence in your 3D measurements? Are you certain they are accurate, repeatable, and reliable? See the articleAmongst the many interesting projects that I have been involved with as an application specialist at Creaform, the job that I have recently completed at ZODIAC AEROSPACE, both challenging and exciting, definitely stands out. ZODIAC AEROSPACE manufactures and specializes in passenger aircraft interiors.
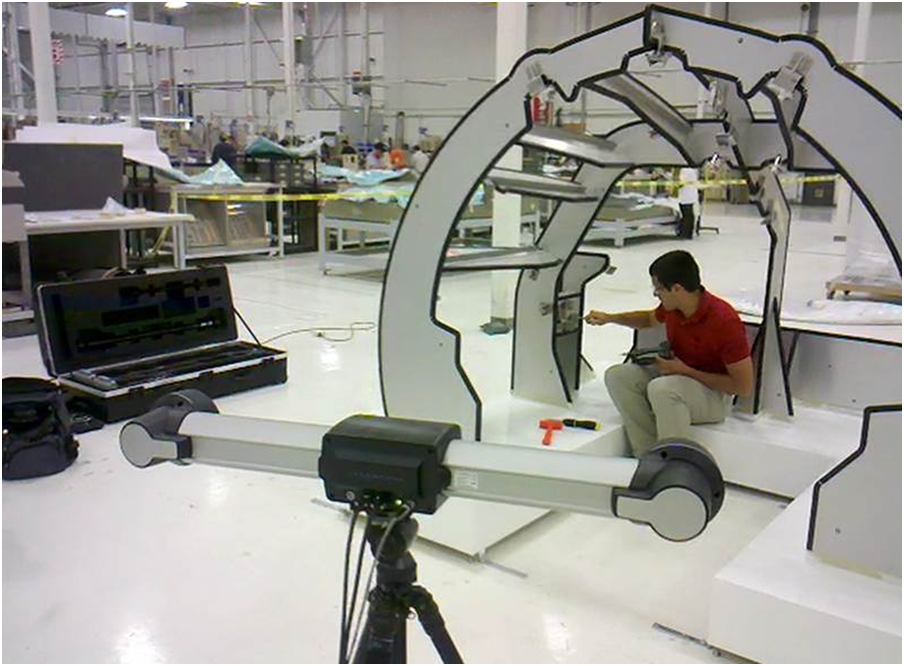
The company called for Creaform’s expertise and precision tooling for this project and I was lucky enough, along with another fellow application specialist, to be assigned to it. The work was done last May at their assembly workshop in Kirkland, Québec, with the main objective to adjust a jig for the Bombardier Learjet 85 cockpit that ZODIAC AEROSPACE will use to test interior equipment and accessories in the jig for verification purposes prior to shipping it.
Needless to say the adjusting brackets had to be positioned exactly as per technical drawings. So, a total of 36 adjusting brackets were placed and spaced evenly all around the cockpit over a 3-day period. For this job, we used a HandyPROBE portable and arm-free CMM, with a C-Track dual camera sensor.
The bracket adjustment requirement for accuracy was quite high (0.01”), but we did manage to comply with the technical drawings in a fast and efficient manner. For the areas of the cockpit requiring us to block the reference points of the C-Track, we just switched from dynamic to static acquisition, which allowed us to gather precise measurements in a more comfortable position (we also got help from the interchangeable probes on the HandyPROBE). The PolyWorks software application and its real-time readout functionality allowed us to save a considerable amount of time as we could compare the position of the bracket with its technical drawing on the fly.
Heavy machinery was in use in the workshop during the measurement process, generating vibrations and noise that would normally temper with precision measurement. However and thanks to the dynamic referencing capabilities of the HandyPROBE, this was not our concern! Moreover we didn’t need to realign the C-Track during the project, as the system detected all the reference points we had placed around the jig.
Once done with the bracket adjustment and verification, we placed reflectors on each bracket to save the position and capture it directly with the C-Track, to eventually ease future work on this jig (because the position of each bracket in now saved). From now on, a system check with the C-Track will only be a matter of minutes.
In retrospect, this project was very interesting for its complexity but also because my colleague and I were able to take a peek at the equipment that is going to be on board of the Bombardier Learjet 85! 😉 We weren’t the only ones impressed though, as the workshop product manager was bewildered at the possibilities of our tools, and even asked us for a Creaform souvenir!


