November 4, 2024
Improving Construction Processes with 3D Metrology See the articleBabcock is trusted to deliver—and trusts Creaform’s easy-to-use scanning technology to carry out quality control workflows for its manufactured parts.
With more than 125 years’ experience, Babcock is one of the most established and experienced steam generator and industrial plant suppliers in Africa. The company is specialized in the front-end design of steam generation plants and associated equipment. It provides effective solutions for the entire lifecycle of industrial plants, from design and build, through operation and maintenance, and all the way to decommissioning and remediation.
The Project
Babcock was tasked with replacing steam spherical headers on a main steam piping system at a client’s power generation facility. The challenges faced in executing the project were two-fold:
- Ensuring that the manufactured replacement parts were according to spec and respected the approved designs
- Aligning the manufactured spherical header with the required interface points on site at the client’s facility. The header had a total of five interface points that had to be aligned to within a very fine tolerance.
The existing header was located in a very confined space where access was a challenge, which made the use of conventional 3D scanning technology difficult and time-consuming. In the past, Babcock used a terrestrial scanner to capture data from existing plants and models were created based on the captured information.
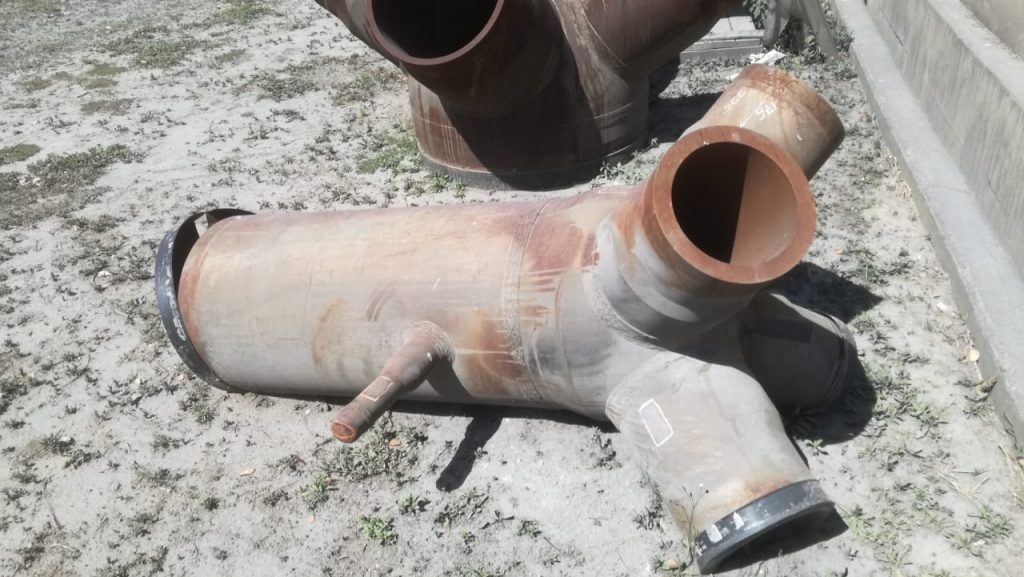
The design process entailed creating a 3D model of the spherical headers, from which 2D manufacturing drawings were created. From these drawings, the headers were then fabricated at a manufacturing facility. The manufacturing tolerance was ±0.5 mm. It was approximately 1700 mm long, had an outside diameter of 600 mm, and a total estimated mass of 1414 kg.
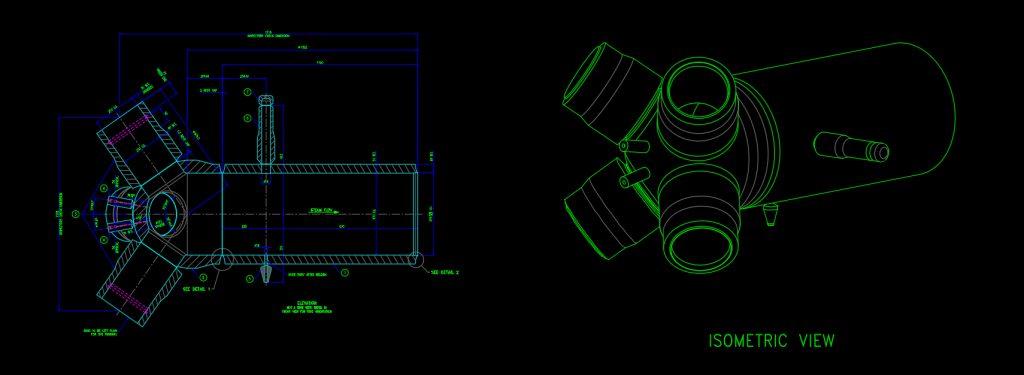
Revised manufacturing drawing with Creaform’s mesh of the spherical header
Once fabricated, the final product was scanned using the Creaform handheld HandySCAN 3D scanner and VXelements software. The scanning lasted approximately three hours. A mesh was created to show the geometry of the manufactured product. This mesh was then overlaid onto the initial 3D model. The data was analyzed and processed using a combination of software such as CloudCompare, MeshLab and Meshmixer. This process allowed the team to check the accuracy with which the headers were manufactured and whether they were produced according to spec.
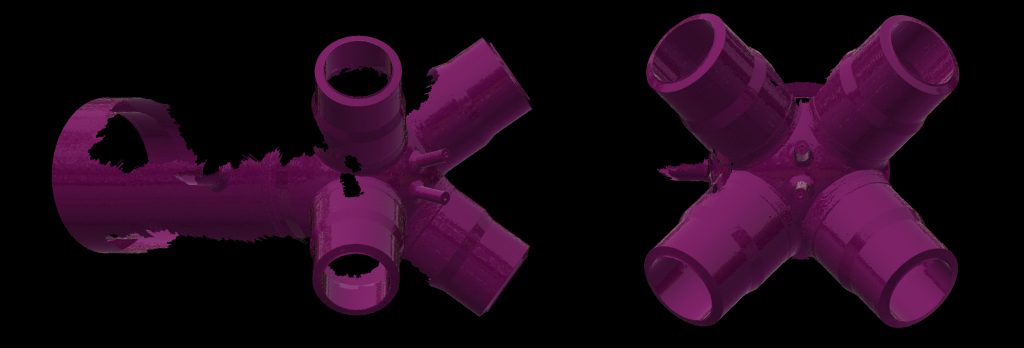
Creaform’s mesh of spherical header
The headers were then manufactured with excess lengths at each terminal point, called green ends. The reason for green ends is to allow for final modifications during fit-up activities at the client’s facility. These green ends had to be cut to within very specific tolerances (fractions of a millimeter). Incorrect cuts could have resulted in the part not fitting as intended, or worse, the part being completely scrapped, thereby generating unnecessary costs.
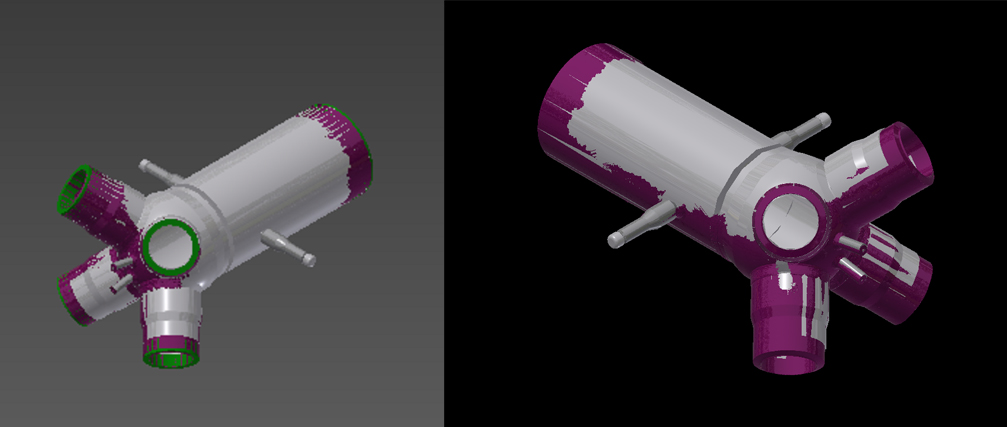
Creaform’s mesh overlaid with a Babcock 3D model featuring green ends
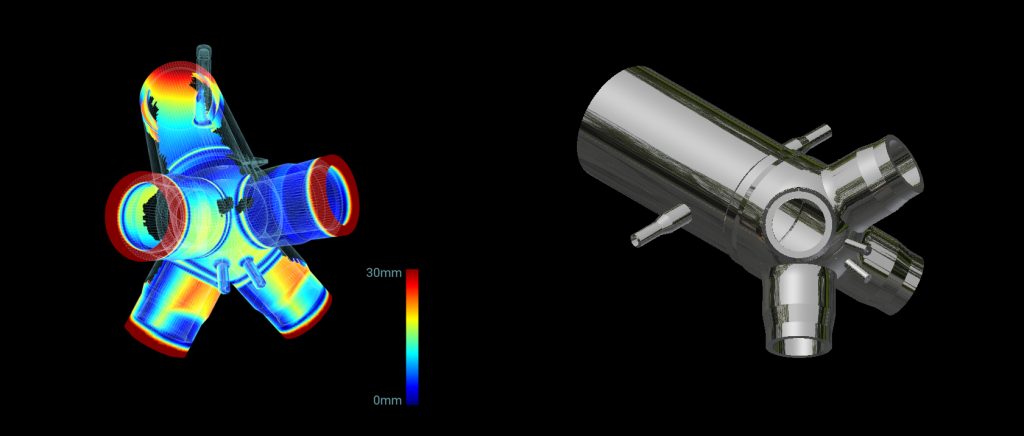
Image 1: Comparison between the scanned manufactured component and the mesh with the de-designed component to check any irregularities | Image 2: 3D model with green ends
The Creaform mesh was overlaid onto a point cloud that was generated from a conventional 3D scan. This allowed the team to determine the required cuts for the green ends and existing pipework to ensure an exact fit during construction.
Why was the HandySCAN 3D scanner selected?
“We decided to incorporate Creaform’s HandySCAN 3D scanner because of the convenience that its compact nature offered over conventional scanners, as well as its high level of scan accuracy. This, along with the speed and ease of use, made it an obvious option for this project,” explained Chris Bosman, the Engineering Department’ Drawing Office Manager at Babcock inSouth Africa.
Another reason Creaform’s solution was chosen was the accuracy with which the scanner could capture geometry in-situ as well as the ease with which the user could execute a scan of the required geometry. Also, the conventional workflow, which involved scan registration, was not as drawn-out as with other scanners; Creaform’s handheld 3D scanner registered scans on-the-go.
Mr. Bosman also explained: “It would have been possible to realize the above described project without the Creaform scan technology. However, the process would have been much more challenging without it due to the confined space where the scans had to be conducted at the customer’s plant. The use of the HandySCAN 3D allowed us to perform quality checks of the manufactured parts. It also enabled us to do detailed planning before executing the project and mitigate the risk of the part not fitting as intended.
Note: All pictures in this article have been provided by Babcock South Africa


