October 24, 2024
3 Simple Tests to Recognize High-Quality 3D Scanners with no Calibrated Artifacts Required See the article“After we had tested several systems in complex procedures, we opted for the HandySCAN 3D scanner based on our decision criteria. We still feel reassured in our choice today.”
TÜV AUSTRIA AUTOMOTIVE GMBH is an accredited technical service provider that specializes in the testing, inspection and approval of vehicles and components as well as in electromobility and automated driving. The company advises clients on all relevant fleet matters with a focus on the economic and ecological use of new driving technologies. Since 2018, the company has been using a Creaform HandySCAN 3D in its workshop for services.
Why Invest in a New Measuring System?
Almost every company today has diverse measuring systems or makes use of services for the measurement of components or entire objects. TÜV AUSTRIA AUTOMOTIVE has already used handheld devices in the past to measure the brake lining contours on a vehicle. However, these devices could only be attached directly to the vehicle by using various adapters. By scanning the required contour with the measuring tip, a point cloud was created and the contour was displayed in a 2D file in the AutoCAD program. Because the traditional measuring devices were custom products, they could only be used for very precise applications. The company was therefore limited in its measurement capabilities. In addition, replacement parts were difficult to obtain and usually had to be manufactured—all at a considerable cost.
The challenge was to find a 3D measuring system, which was not only affordable but also helped the company extend its state-of-the-art inspection services in the future. Additional criteria that influenced the purchase were clear improvements in the measurement quality and traceability as well as a reduction in errors. Also, the new system had to be easier to handle, reduce the effort required to measure, and increase user satisfaction and efficiency. These numerous requirements had to be met with a new, modern and future-proof measuring system.
The Decision for the HandySCAN 3D
After three years of evaluating various measuring systems and after TÜV AUSTRIA AUTOMOTIVE had provided an overview of the measurement technology available on the market, HandySCAN 3D, the portable 3D scanner from Creaform, was ultimately chosen.
| The basic requirements regarding suitability for applications in the areas of quality control, competitive product analysis, temperature stabilization, 3D scan-to-CAD, finite element analysis and reverse engineering were met by the HandySCAN 3D. Mobility, flexibility and usability were also factors influencing the investment decision. Due to the laser technology of the HandySCAN 3D, outdoor use in sunlight as well as scanning of shiny surfaces without additional chalk spray is easily possible. Data preparation in 3D, data quality and the support offered by Creaform (e.g. replacement devices in the event of failure) also made the decision easier. The accuracy of the 3D scanner played a decisive role with regard to future services. |
Application Areas
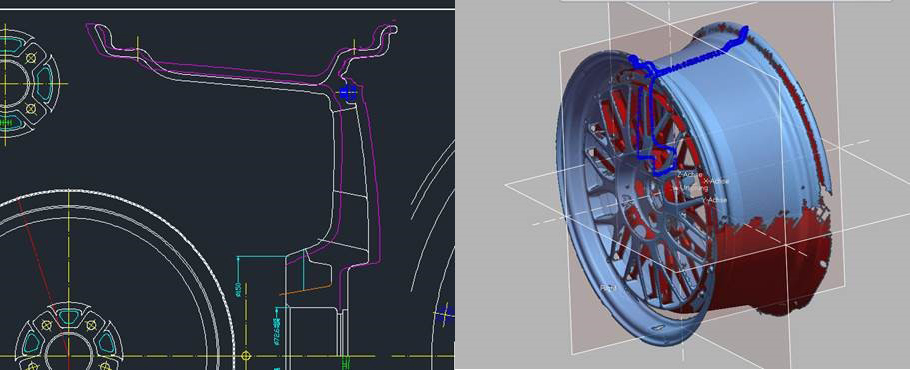
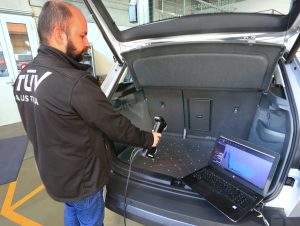
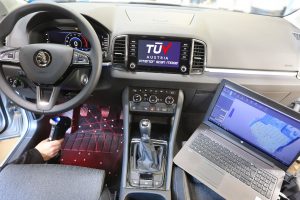
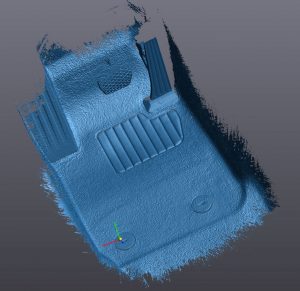
| The HandySCAN 3D is used in conjunction with the software VXelements and Geomagic Design X for the most diverse measurement tasks at TÜV AUSTRIA AUTOMOTIVE, mainly in the workshop. In addition to measuring the circumferential clearance in the wheel arches on full lock, the 3D scanner is also used for measuring wheel rims, footwells, trunks, RDKS sensors, engine compartments, and deviations in replacement components. In the future, the 3D scanner can also be used for assessing damage caused by hail on body parts.
Currently, TÜV Austria AUTOMOTIVE is also involved in building up a database for the automotive supply industry. This means it will be possible in the future to derive the dimensions required based on a 3D model and produce the corresponding prototype – keyword: fitting parts As TÜV Austria AUTOMOTIVE already operates one of the largest databases for series production data of all automotive brands in the world, this additional service is offered. Data for registered customers will be available for download quickly, conveniently and in the best quality. The purchase of HandySCAN 3D has already paid for itself within a short period of time. Previously, two employees had to operate the measuring system, whereas only one operator is now needed for the 3D scanner. Risks, which become clear in the FMEA analysis, could be considerably reduced by using the 3D scanner. |
The data can be tracked clearly and verified better, meaning that the majority of direct and indirect error costs will be avoided in the future.
“After we had tested several systems in complex procedures, we opted for the HandySCAN 3D scanner based on our decision criteria. We still feel reassured in our choice today,” explained Dipl.-Wirt. Ing (FH) (Graduate Industrial Engineer) Friedrich Fleischer at TÜV AUSTRIA AUTOMOTIVE GMBH.

About TÜV AUSTRIA AUTOMOTIVE GMBH
TÜV AUSTRIA Group is, on account of its size and organization of suppliers, customers and team members, completely independent, both in terms of professional decisions and financially.
TÜV AUSTRIA AUTOMOTIVE GMBH is an accredited technical service and offers a comprehensive service portfolio from the inspection and submission for approval of individual components as well as accessory components to the creation of information documents for complete vehicles in Europe and worldwide.
In addition to the areas of homologation, certification and verification for companies in the supply industry, testing and inspection of vehicles and components, assessment of vehicle modifications, FEA calculations of wheel rims and components as well as EMC tests of vehicles and vehicle components, maintenance of the world’s largest database regarding the use of wheel/tire combinations for European vehicles is one of our core competences.


