Placeteco is a Canadian company that specializes in the design, development and manufacturing of components and sub-systems for the aerospace and transportation industries. Founded in the late 80’s, the company quickly reached a turning point with one of the world’s leader in aerospace manufacturing tasking it with the development of cockpit components for two different models of aircrafts. Placeteco uses state-of-the-art technologies for vacuum forming, laminating composites part, resin infusion, polyurethane injection and moulding of silicone parts.
To date, this partnership is still going strong, as Placeteco was commissioned by the manufacturing giant to design and manufacture leather-covered glareshields (a composite screen attached to an aircraft cockpit canopy that is designed to reduce the effects of glare) for its aircrafts.
Wanted: quick and reliable inspection solution
To conform to the aerospace industry highest quality standards, Placeteco must perform and document a dimensional inspection of the glareshields at each stage of the manufacturing process. In this particular case, the difficulty lied in the leather covering. Once applied onto the composite structure, its softness when touched (by a probing tip for instance) put the conventional touch-probing machines out of the running, at least for the surface inspection. The company needed to consider inspection technologies that were non-contact and would comply to 4 other requirements:
- Complete high-density surface inspection on the composite shell
- 3 feature-based alignments to analyze various mating surfaces (located between the glareshield and the cockpit console)
- Quick inspection process that would decrease delivery time
- Very high repeatability process
At that point, very few options were left.
Creaform Saves the Day (while Placeteco Saves Time and Money!!)
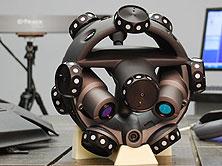
To sum it up, the ideal measurement tool would have to 3D scan without contact (for the high-density surface inspection) and feature probing capabilities (to accurately measure the alignment features). A few months ago, such 2-in-1 tool did not exist, but the release of Creaform’s MetraSCAN optical CMM 3D scanner came at just about the right time for Placeteco.
The MetraSCAN boasts 3D scanning AND probing capabilities. The MetraSCAN’s Truaccuracy technology ensures high accuracy measurements, no matter the environment, while its capacity to output the measurement data in a same, single alignment, which leads to very short data acquisition time.
Last but not least, its dynamic referencing mode literally “locks” the coordinate system onto the parts being measured, which maintains part alignment during the entire 3D scanning process, which ultimately guarantees high repeatability.
Mission Accomplished
Thanks to the MetraSCAN and its combined scanning and probing capacities, Creaform delivered standard-complying high-density triangulated mesh for surface inspection (3D color map) and geometrical entities, allowing accurate alignment with increased repeatability.
For Placeteco, this translated into reduced labour costs and quickly delivered, 100% accurate inspection data. Plus, the company can expect to lower the inspection time required by 75% compared to conventional CMM measurement and to significantly increase the quality of its products, as the millions of comparison points provided by the MetraSCAN (instead of a few hundreds for a CMM device) prevent defects or small deformations to go unnoticed and undocumented.
Compared to scanners on measuring arms, the MetraSCAN provides increased accuracy, as it achieves the same accuracy than a probing device! The MetraSCAN’s accuracy is more than just number in a specification table: the device truly lives to its expectations, an does achieve the 85 µm it advertizes in real , day-to-day inspection jobs.


