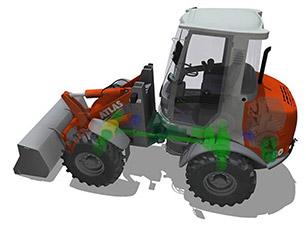
Initial Sampling of Components and Checking Serial Parts with the Handyscan 3D
As well as being innovative in developing and building its wheel loaders, the long-established company Atlas Weyhausen GmbH is also innovative in its quality assurance: Since the start of 2011, the company has used the Handyscan 3D three-dimensional scanner from Creaform with Geomagic software to measure components and equipment, but also for data feedback from prototype parts.
Atlas Weyhausen has produced wheel loaders for the construction industry, garden and landscaping works, agriculture, materials handling and recycling for more than 40 years, with an emphasis on quality and innovation. This means that the Quality Assurance department plays a crucial role in the medium-sized company.
The Old and the New Measuring System
Although traditional measuring systems such as coordinate measuring arms were used for quality assurance in the past, the decision was taken in 2011 to move with the times and the search began for a more innovative and flexible measuring system. The measuring arm could only record individual measuring points, not complete surfaces. The arm was not suitable for use in changing working environments either, as it constantly had to be recalibrated and installed in stable working environments; vibrations or instabilities in the working environment produced inaccurate measuring results. Even a potential additional scanning attachment for the measuring arm failed to convince.

The portable self-positioning Handyscan 3D Scanner generates precise and reproducible high-resolution 3D data. The integrated TRUaccuracy technology allows dynamic referencing, so that the part to be measured can be moved during the 3D scanning process. There is no rigid setup, as was the case with measuring arms. Mr. Ralf Vosteen, Quality Assurance employee, explains: “The major benefit of the scanner is clear to see: Freeform surfaces are easy to align, along with 3D data. A further benefit is also the data feedback into our CAD system.”
Atlas Weyhausen is now using the Handyscan 3D with Geomagic Quality and Studio software for initial sampling of new components and to check serial parts in particular. The enterprise is increasingly encountering situations, however, where several installed components have to be inspected in their installed location, or where some equipment has to be recorded abroad at the supplier’s location itself. The scanner is also used to feed back data for prototype parts that are manufactured in-house for prototype production.
Scanning and Reverse Engineering a Display Shell
One project where the Handyscan 3D with Geomagic software was used was the series production of the display shell for wheel loaders.
The benefits of the handy 3D scanner were clear here: The first prototype parts were scanned in for measuring, aligned on the 3D model in the Geomagic Qualify software, and a color comparison was carried out to identify deviations.


A section was placed in the scan to check individual dimensions.

This allows all the relevant dimensions to be checked so that the tool can then be released for production.

A number of features are also checked directly in the scan.
The project could also have been carried out without the 3D scanner from Creaform, but that would have entailed great effort as it would only have been possible to record individual measuring points with the old measuring arm and the complete display shell could not have been digitized.
Using the Handyscan saves Atlas Weyhausen time and money, because the handy Handyscan 3D is easy to use in any location and can digitize even complex items in a very short time. It also means that production equipment and the parts manufactured with this equipment can be checked on site at supplier’s premises, and results can be evaluated immediately. Even air travel is no obstacle here, as the device can be carried in hand luggage.

Mr. Vosteen, Quality Assurance employee at Atlas Weyhausen, is enthusiastic: “Handling the scanner is child’s play: You don’t have to secure the component to be tested and you only have to set a few positioning points on the part to be measured so that the laser scanner aligns itself with the surface to be scanned. Then you can start scanning. I think it is important that Creaform don’t just make promises; they also keep them, and I only have good reports from that perspective. If problems arise, you can always contact an employee by phone who can give advice or put you in touch with someone else. It is also commendable that Creaform frequently offer workshops where you can make contact with other users as well.”
About Atlas Weyhausen
The long-established company Atlas Weyhausen GmbH has been producing compact wheel loaders for a range of uses for more than 40 years. The striking ATLAS wheel loaders are used around the world: in the construction industry, garden and landscaping works, agriculture, materials handling and recycling. www.radlader.com


